Building the tilt front Super Smooth

This lesson is on building a tilt front Super Smooth. The way we do it won't work on all cars but it will work on most of the cars without front bumpers that have the grill built into the body.
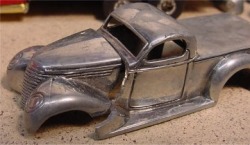
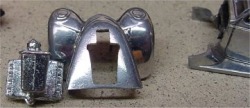
Drill out a Super Smooth and strip the paint off. You can do the hood one of two ways.
You can cut a hood off of one and trim to the hood lines, then cut another body and trim out to the hood lines.
The other way is to use a razor saw and cut along the hood lines. This actually is easier to do because you have the fenders lined up as soon as you finish the cuts.
You can cut a hood off of one and trim to the hood lines, then cut another body and trim out to the hood lines.
The other way is to use a razor saw and cut along the hood lines. This actually is easier to do because you have the fenders lined up as soon as you finish the cuts.
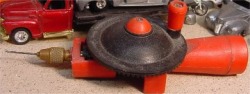
You need to cut the ends off of an axle and get a piece of tubing it will fit in. You can get aluminum tubing the right size at some hobby stores. If you can't find any tubing you can use the straw off of a can of WD 40. It works just fine but will develop more slop as you play with it.
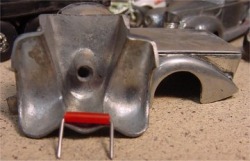
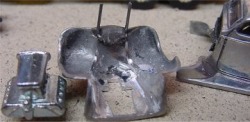
JB Weld the tube into the front edge of the hood. This is easy to do on the Super Smooth because the hood has a ridge where it sits on the base. You also need to grind off the rivet so your motor will fit.
Now the base needs to be trimmed back. Trim it back far enough that the hood and hinge will fit and the hood sits where it belongs.
You will need a hobby drill and a #59 wire bit. The bits can be found at hardware stores.
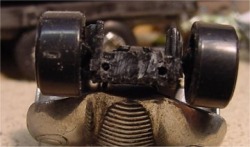
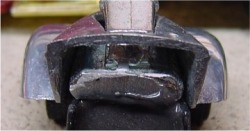
Drill two holes into the front of the base for the wire in the hinge to slide into.
Slide the wires into the holes and check for fit.

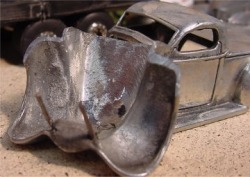
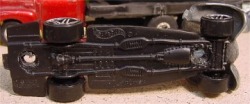
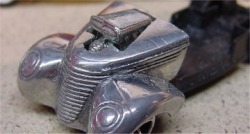
Set the body on and trim back the window and interior then make sure you can close the hood and it sets on the fenders where it belongs. If it doesn't sit back far enough just trim some more off the base.
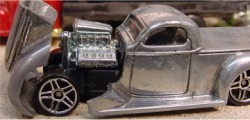
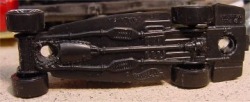
Now it is time to prepare for a motor. I am dropping in an Altered States Motor after I grind enough off the bottom so it sits on the frame.
If the motor you are using is going to come through the hood you need to grab your dremel with the rotary files and your hobby files. Start with a smaller hole near the back of the hood and keep working it out until you have it where you need it. Then you can use the hobby files to straighten up the lines.
Remember, as the hood tilts forward you will need room for it to clear the motor.
Remember, as the hood tilts forward you will need room for it to clear the motor.
The Altered States motor is a little too wide and hits the inside of the fenders so I had to grind it out a little.
Slide the wires into the base and set the motor on the base. Make sure the motor doesn't get hung up on the hood when you tilt the hood forward. You will have to do some more filing to get it right.
Once you have it fit right leave it there and put your JB Weld into the space between the base and motor. As it sets up check your tilt again and adjust the motor while you still can.
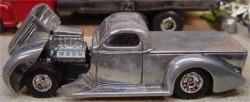
Well, It's getting there. Starting to look good now. The wheels and paint are up to you.
I hope you had fun and learned a little something along the way. If you build a tilt nose using my instructions please send me a picture of your finished project so I can put it on my site.
I hope you had fun and learned a little something along the way. If you build a tilt nose using my instructions please send me a picture of your finished project so I can put it on my site.
| Provided by graphic design schools site. |
