Building the Chopped Top 69 Chevy Pickup
Here it is. The very plain 69 Chevy. It's OK but we can do so much more with it. I thought it would look great slammed and chopped and have done a few so if you are ready lets do it.
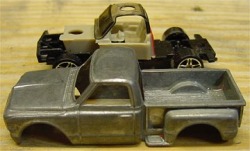
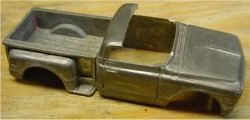
First you need to drill out the rivets and strip down your truck. You should already have figured out how to do that. Here it is pulled apart and stripped down.
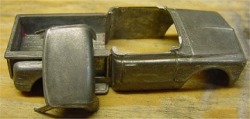
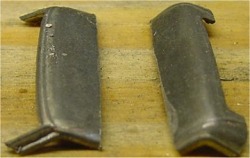
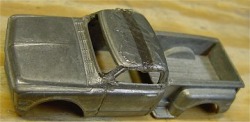
Now you need to cut the roof off close to the body. Take your time and keep it neat.
Now trim down the posts and the rear of the cab. Keep taking a little off at a time until you get it as low as you want it. Now you can see that it isn't going to fit right. Uh Oh!
Because you want the windshield to fit right you can't just bend the pillars either.
Because you want the windshield to fit right you can't just bend the pillars either.
Since you can't bend the pillars you will need to split the roof in the center so you can stretch it out. That way the windshield will be at the right angle to fit.
Now you can use some Superglue to bond the rear section of the roof to the rear of the cab. This is just to hold it in place so we can get everything lined up right. You can try to tape it but I find that superglue works great to hold things together until I am ready to slap on the JB Weld.
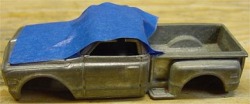
Now you can put a piece of tape across the truck and place the front of the roof in place. The tape makes it easy to reposition the front section so you can get it lined up like you want it.
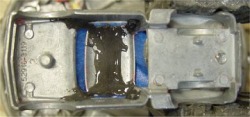
Once you have it in place mix up some JB Weld or epoxy of your choice. With the truck upside down dab the JB Weld into the gap of the roof and on all the joints. Let it set up now. I use JB Kwik so that I wait less that an hour before I can do the first trim. You can trim it easier before it is completely set up.

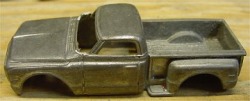
With the tape off you can see that it is lined up like you want it. If you carefully take the tape off before it is cured hard it is easier to pop it apart if it isn't quite lined up.
If it looks good go ahead and add more JB Weld to the outside of the joints and let it set up. I used a clear epoxy here so you can see the joints underneath.
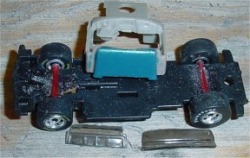
Now you need to trim the windows to fit, paint the back of the seat the color the truck will be, and do the wheels. I wanted to slam this one so I trimmed out the base so the wheels would fit inside the fenders and bonded tubing onto the base at the height I wanted the wheels. Then I cut the axles, put a drop of superglue on the ends and slid them into the tubes. The secret to keep from gluing the wheels is to put a drop of oil in the hub and spin the wheel a couple times.
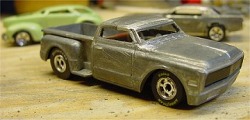
After some sanding to clean it up it's time to do a test fitting on the base. This is really starting to look like something. Time to put some paint on it. After it is painted you will need to use some glue to keep the windows in place. Do not use superglue on windows or chrome as it will fog the plastic.
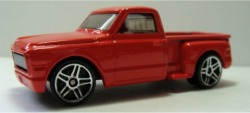
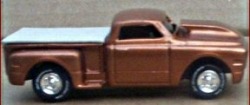
The finished Chopped Top 69 Chevy Pickup
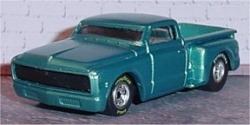
There it is, all painted up and ready to go. It wasn't as easy as most people first thought it would be but it was well worth the trouble. A bed cover on the back would really set this off nice but I'll leave that up to you.
I hope you had fun and learned a little something along the way. If you build one of these using my instructions please send me a picture of your finished truck so I can put it on my site.
I hope you had fun and learned a little something along the way. If you build one of these using my instructions please send me a picture of your finished truck so I can put it on my site.
If you send me pictures of your chopped 69 I will add them here.
Here is Eds Chop Top 69.
Cowl induction hood, Camaro Rallye
wheels, BFG tires, bare metal foiled grill.
Cowl induction hood, Camaro Rallye
wheels, BFG tires, bare metal foiled grill.
| Provided by graphic design schools site. |
