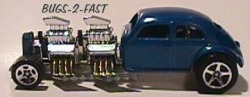
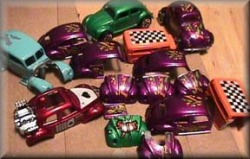
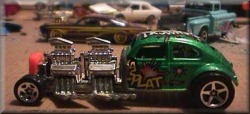
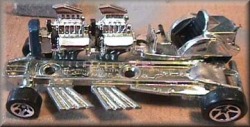
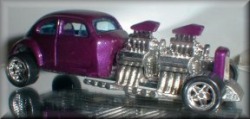
You want to build a custom but you are not quite sure how to go about it. OK, grab your tools, a Way-2-Fast, a Volkswagon Bug, and lets get to work. First though a picture of what we are going to build.
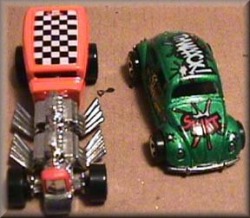
Here they are, Way-2-Fast and a VW Bug. For tools you will need a Dremel tool with a cut-off wheel and a grinding wheel. You will also need some tape, JB Weld(or any type epoxy bonding putty), drill and small bit for drilling the rivets out of the bases. Don't forget a small file and sand paper also.
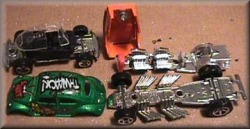
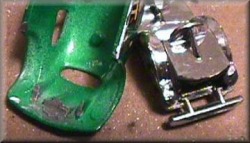
Drill out the rivets and take the cars apart. Don't drill through the car into your hand because I can tell you from experience that it isn't a happy feeling when you do. Don't lose the extra pieces because you may want them for the next custom project you do.
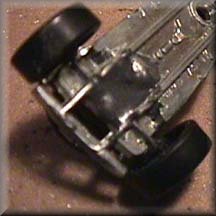
We will be stretching the wheelbase so grind off the tabs holding in the rear wheels. We will also need the firewall out of the Way-2-Fast.

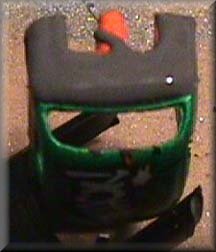
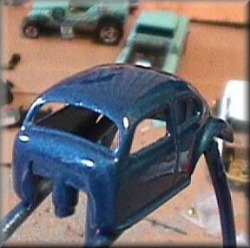
Now take the front of the bug off leaving the window frame.
Toss the front into your pile of parts and pieces so you know where they are if you need it for another project. If you don't have a pile now don't worry. Once you get hooked you will need a box just for parts and pieces.
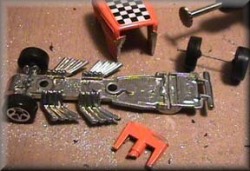
OK, clean out the back of the bug body and trim the back of the Way-2-Fast chassis so that Bug body fits cleanly.
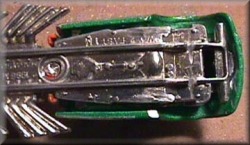
To make the wheels fit the wheel wells we need to mount the axle under the chassis. Cut a groove for it where it looks right. Also make sure the firewall fits right. If it doesn't do a little grinding until it does.

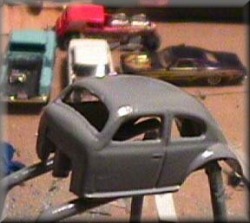
Let's set it all together to check for fit. It is looking pretty good so far.
Tape the firewall into the front of the bug and mix up some JB Weld or other metal epoxy. Put plenty on it because you can trim it before it sets all the way and once it does set up you can file and sand it down smooth. This works great for any type of bodywork you are doing.
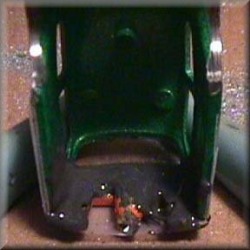
Go ahead and epoxy in the rear axle. Try to make it smooth so you can paint it silver or chrome to match the chassis.
Once the inside of the body sets up you can take the tape off and put some more epoxy on the outside. Remember that you can trim, file, and sand this smooth so make sure you get plenty on it.
One more test fitting before you start cleaning it up. Make sure the wheels have clearance and the body sits straight.
I made my paint stands out of plastic coated hangers. I bend them into stands so I can squeeze them together inside the car and the tension holds them in place. Once you have cleaned up the body spray some primer on it. I used a rattle can of gray primer. You can primer it, then clean up any place that doesn't look right and primer it again.
Now is also the time to do a little detail on the inside of the car and to paint the front radiator cowling the same color you will be painting the body. I used flat black model paint to do the seat, steering wheel, and blower belts.
It is amazing what you can do with a plain old spray can. After the paint sets up you can epoxy or rivet it back together and.....................
Congratulations, you built your very own custom that anyone would be proud to own.

Here are some more of my projects along the same line
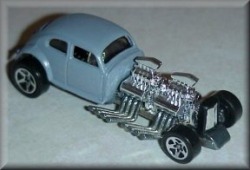
I extended the Bug front end to build this one.
This is my Way-2-Buggy
You don't have to use the VW Bug body.
Prepare the Bug Body the same way to build this one.

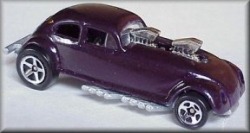
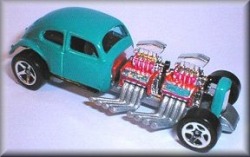
The Blown Bug
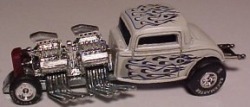
Some more Bug Way-2-Fast customs from other people.
Here are some customs from other people based on the same idea. Some have used different ideas and some do better paint jobs. However you build yours the main thing is that you can build it however you want and it is your creation.


| Provided by graphic design schools site. |
